Train YOLO on a Custom Dataset: A Step-by-Step Guide
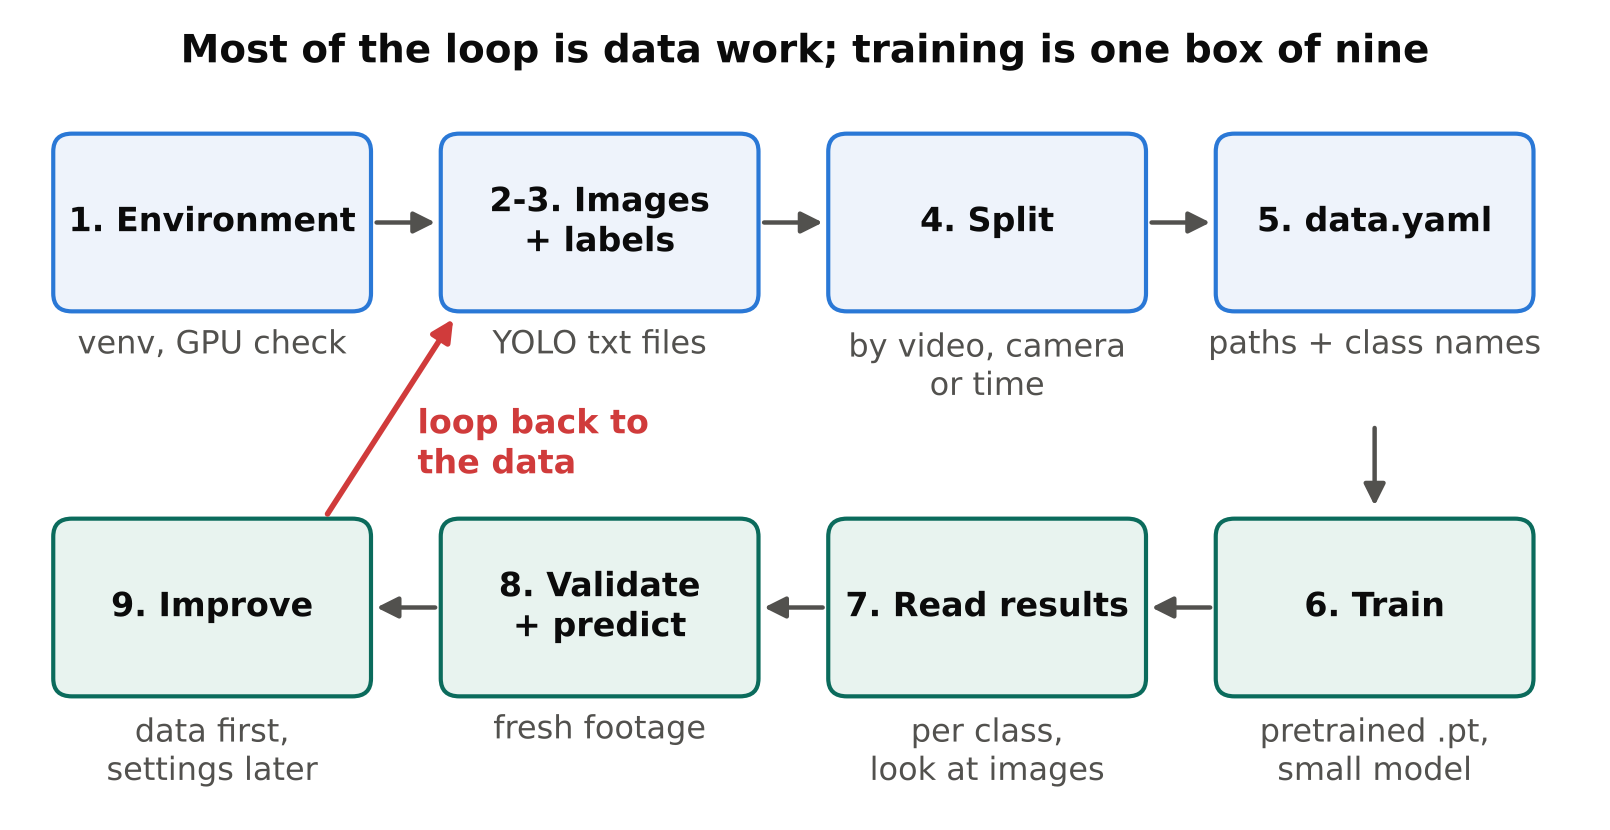
Training a YOLO model on your own data is a short sequence of steps: prepare images and labels, describe them in a config file, run training, and read the results. The code is small. Most of the effort and most of the mistakes are in the data.
This guide uses the Ultralytics Python package. Check the current licence before using the models commercially. Ultralytics models are released under AGPL-3.0, with a commercial licence available from Ultralytics. See YOLO Licenses Explained: AGPL, GPL and Commercial Use.
Step 1: Set up the environment
Create a clean virtual environment and install the package:
python -m venv .venv
source .venv/bin/activate
pip install ultralytics
Training is practical only on a GPU. If your PyTorch install does not see a CUDA device, training will be very slow. Check with python -c "import torch; print(torch.cuda.is_available())". For help with matching versions, see Setting Up a Clean Python Environment for Computer Vision. If you have no local GPU, see Training on Google Colab: Limits and Workarounds.
Step 2: Lay out the dataset
The standard layout puts images and labels in parallel folders:
dataset/
  images/
    train/  img001.jpg ...
    val/    img500.jpg ...
  labels/
    train/  img001.txt ...
    val/    img500.txt ...
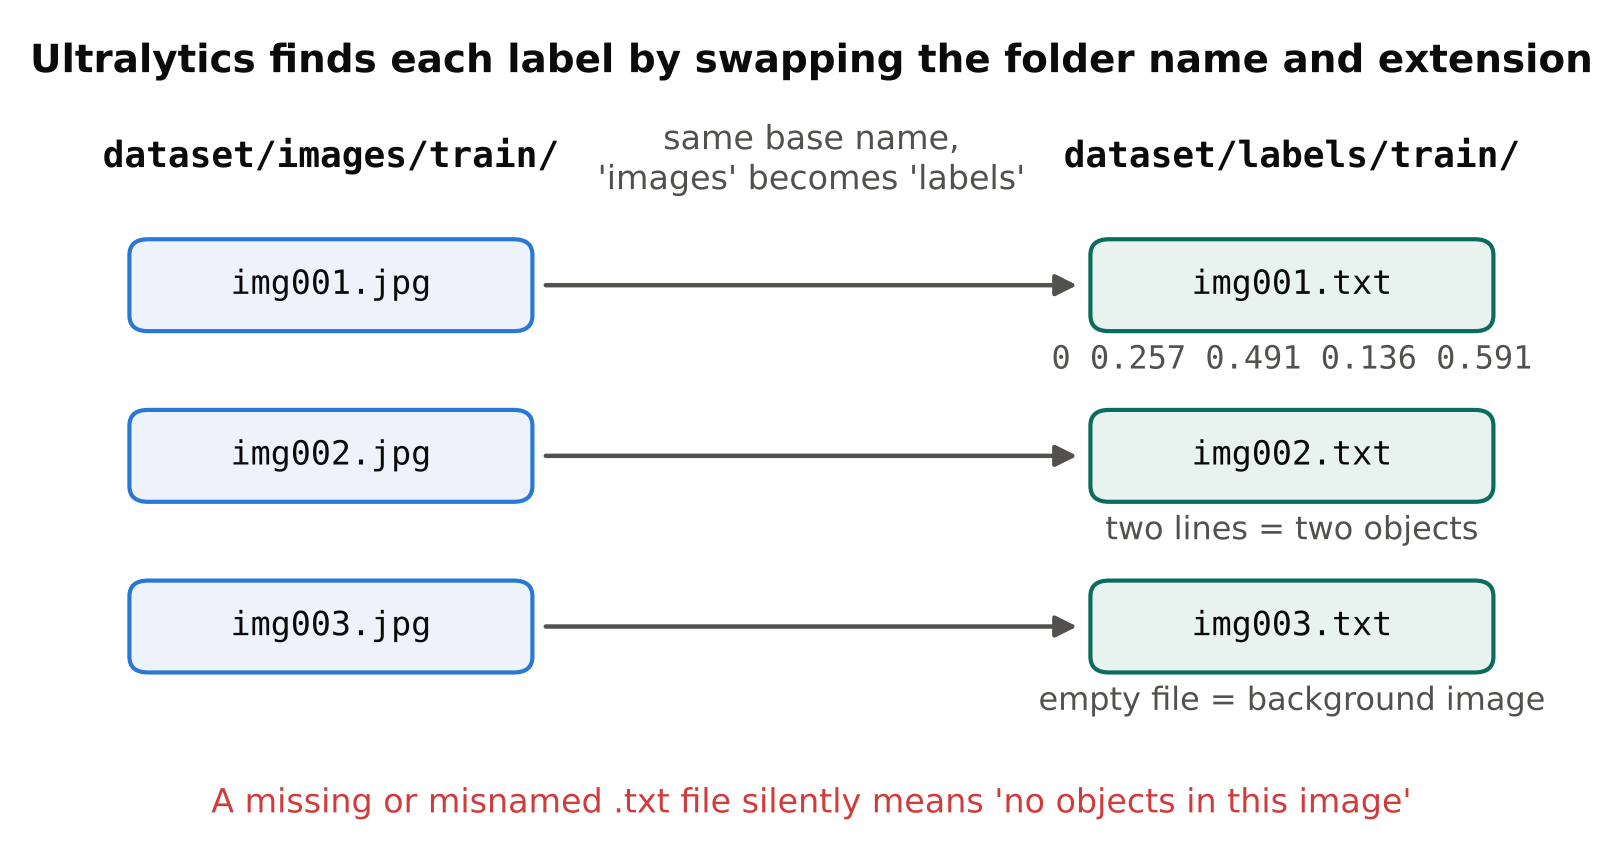
Ultralytics finds the label for an image by replacing images with labels in the path and changing the extension to .txt. Each image needs a matching text file with the same base name.
An image with no objects can have an empty label file, or no file at all. Including such background images is useful, because they teach the model what to ignore.
Step 3: Understand the label format
Each line in a label file describes one object:
class_id x_center y_center width height
All four box values are normalised to the range 0 to 1, relative to the image width and height. The class id is an integer starting at 0. For example, 0 0.5 0.5 0.2 0.3 is a class-0 box centred in the image, 20 percent of the width and 30 percent of the height.
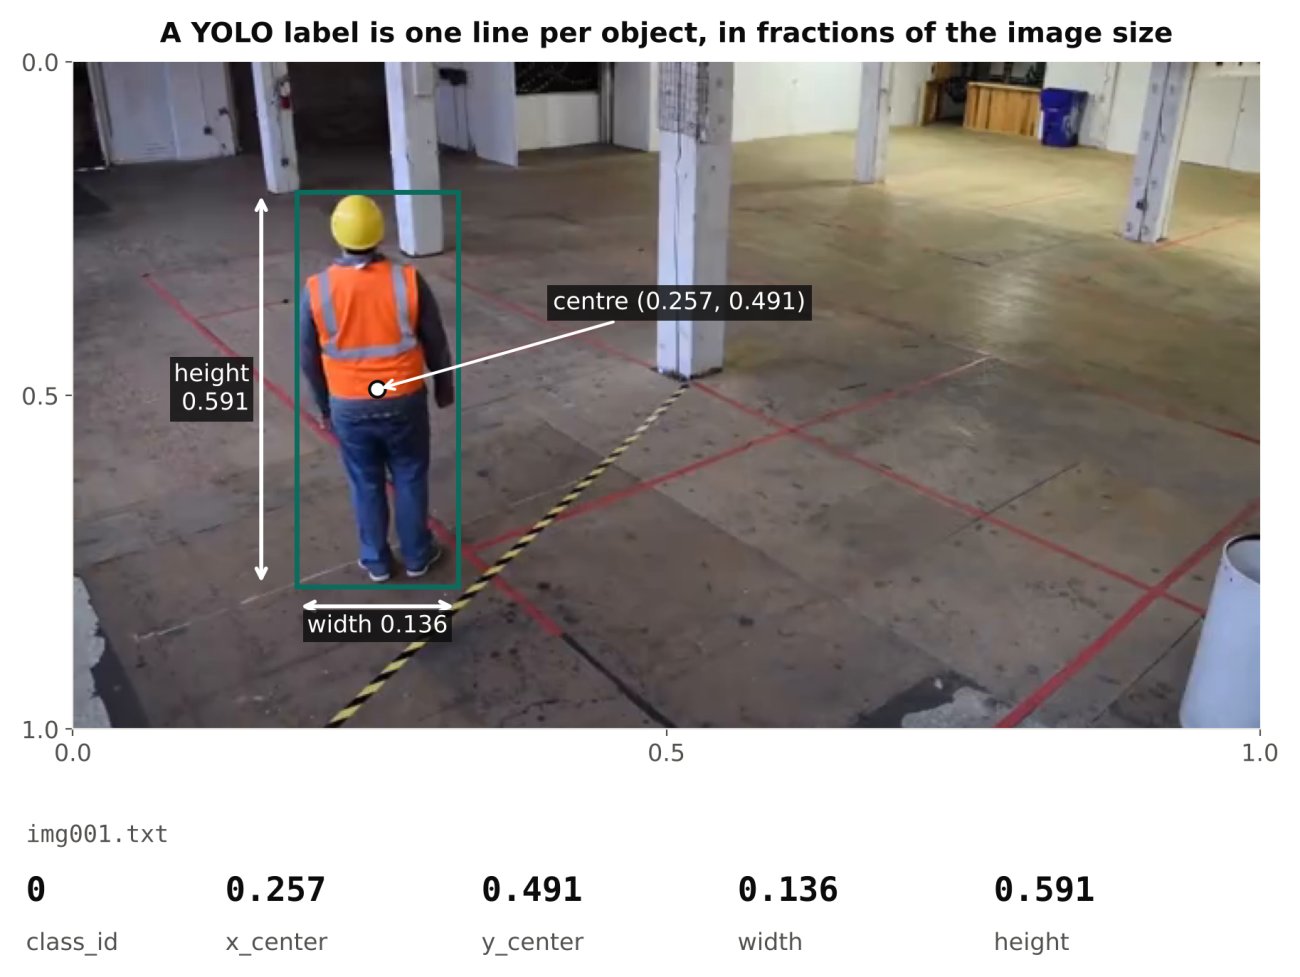
If your annotation tool can export in YOLO format, use that. If you convert from another format, draw a few converted boxes on images and look at them. Swapped width and height or pixel values in place of normalised ones are common conversion bugs.
Step 4: Split the data properly
Split into training and validation sets before you train. If your images come from video, split by video, camera or time period, not by random frame. Neighbouring frames are nearly identical, so a random split puts almost the same image on both sides and gives falsely high metrics. See Train/Validation Split for Video Frames: Avoid Data Leakage.
A held-out test set, never touched during tuning, gives you an honest final number. If data is limited, at least keep validation clean.
Step 5: Write data.yaml
This file tells Ultralytics where the data is and what the classes are:
path: /path/to/dataset
train: images/train
val: images/val
names:
  0: helmet
  1: vest
The path is the dataset root, train and val are relative to it, and names maps class ids to names. The ids must match the numbers used in your label files.
Step 6: Run training
Start from a pretrained checkpoint rather than from scratch. Pretrained weights usually give a much better result with limited data:
from ultralytics import YOLO

model = YOLO("yolo11n.pt")
results = model.train(
    data="data.yaml",
    epochs=100,
    imgsz=640,
    batch=16,
)
Choose the model size based on your hardware and accuracy needs. See Nano, Small, Medium: How to Choose a YOLO Model Size. A small model is a sensible first run because it trains quickly and gives you a baseline.
Notes on common arguments:
epochs: how many passes over the data. Ultralytics also has apatiencesetting that stops training early when validation stops improving. Check the docs for your version.imgsz: training image size. Larger sizes help small objects but cost time and memory.batch: if you run out of GPU memory, lower it.device: select the GPU explicitly if needed.
Each run saves into a folder under runs/detect/, containing weights, plots and a results file.
Step 7: Read the results
Open the run folder. The important files:
weights/best.ptandweights/last.pt: the best checkpoint by validation fitness and the final one.results.pngandresults.csv: loss and metric curves per epoch.- The confusion matrix, which shows which classes are mixed up.
- Precision-recall and F1 curves, which help you pick a confidence threshold.
- Sample validation images with predictions drawn.
How to read them:
- Training and validation loss should both fall. If training loss keeps falling while validation loss rises, the model is memorising. See How to Spot Overfitting in Object Detection.
- Precision measures how many detections were correct. Recall measures how many real objects were found. mAP summarises both across thresholds. See mAP, Precision and Recall: How to Read Detection Results.
- Look at per-class results, not only the average. A good average can hide a class that fails.
- Look at the actual predictions. Numbers do not tell you what kind of mistakes the model makes.
Step 8: Validate and predict
Check the model on the validation set, then try it on real images or video:
model = YOLO("runs/detect/train/weights/best.pt")
metrics = model.val()
preds = model.predict("sample.jpg", conf=0.25)
The run folder name may differ (train2, train3 and so on), so use the path printed at the end of your run. The confidence value here is a starting point, not a recommendation. Tune it per use case; see Confidence Thresholds: Tuning a Detector to Cut False Alarms.
Step 9: Improve in the right order
When results disappoint, change things in this order, because earlier items usually give bigger gains:
- Fix the data. Audit labels for missing boxes, loose boxes and inconsistent classes. See Annotation Mistakes That Quietly Ruin Your Model.
- Add data targeted at failures. Look at errors by class and condition and collect examples that fix them.
- Check class balance and small objects. See Class Imbalance and Small Objects: Practical Fixes.
- Adjust augmentation to match the real camera. See Data Augmentation for Object Detection: What Helps and What Hurts.
- Increase image size or model size if your hardware allows.
- Train longer only if validation is still improving.
Change one thing at a time and keep notes of each run's settings and results, so you know what helped.
Common mistakes
- Class ids in labels that do not match
namesin data.yaml. - Label files missing or in the wrong folder, so images silently have no objects.
- Evaluating on data that overlaps with training.
- Judging only by the training curve and ignoring validation.
- Changing several settings at once.
- Testing only on the validation set and never on fresh footage from the target camera.
Checklist
- Environment installed and GPU visible to PyTorch.
- Images and labels in parallel folders with matching names.
- Labels in normalised YOLO format, drawn and checked by eye.
- Split by video, camera or time, not by random frame.
- data.yaml paths and class ids verified.
- First run from pretrained weights with a small model.
- Results read per class, with predictions inspected.
- Improvements made in order: data first, settings later.
Next steps: learn to read the metrics in mAP, Precision and Recall: How to Read Detection Results and understand why starting from pretrained weights works in Fine-Tuning YOLO: Transfer Learning Explained.