Regression Tests for a Vision Pipeline
A vision pipeline can break without crashing. Swap the colour order, change a resize call, upgrade a library, and the code still runs and still returns boxes. They are just worse boxes. Without tests, you find out from a client asking why the alerts stopped.
This article describes a set of automated tests for a detection pipeline, from fast unit tests to slow replay tests, and how to set tolerances so the tests catch real changes without failing on harmless noise. It complements the manual Pre-Deployment Testing Checklist; this one is about what a machine can check every time.
Why vision code needs its own kind of test
Ordinary unit tests compare outputs exactly. Vision outputs are floating-point numbers that change slightly between hardware, runtimes and library versions. A test that demands exact equality fails all the time and soon gets ignored. A test with no tolerance at all passes everything.
So most of the work is choosing what to compare and how close is close enough.
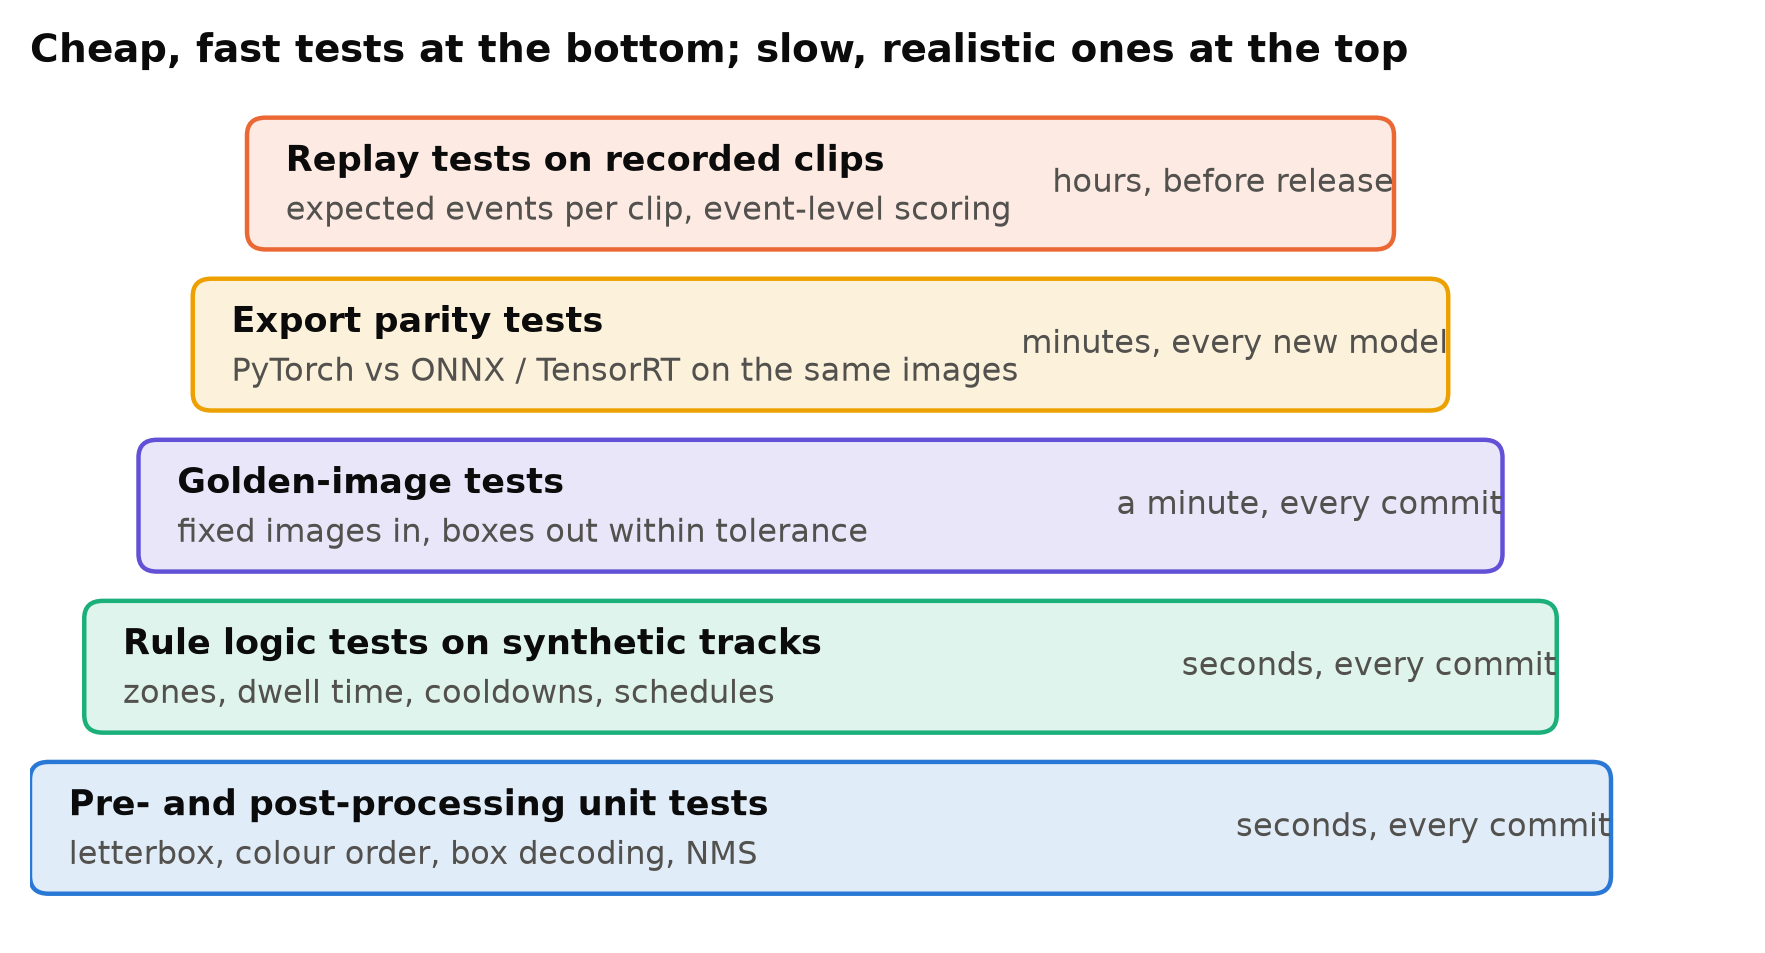
Layer 1: pre- and post-processing
The most common silent bugs live around the model, not inside it: BGR versus RGB, a letterbox with the wrong padding, coordinates scaled back with the wrong ratio. These are pure functions and easy to test exactly.
import numpy as np
from pipeline.preprocess import letterbox, unletterbox_boxes

def test_letterbox_shape_and_padding():
    img = np.zeros((720, 1280, 3), np.uint8)
    out, ratio, (pad_x, pad_y) = letterbox(img, size=640)
    assert out.shape == (640, 640, 3)
    assert ratio == 0.5
    assert pad_x == 0 and pad_y == 140

def test_boxes_round_trip():
    box = np.array([[100.0, 200.0, 300.0, 400.0]])
    _, ratio, pad = letterbox(np.zeros((720, 1280, 3), np.uint8), size=640)
    model_space = box * ratio + [pad[0], pad[1], pad[0], pad[1]]
    np.testing.assert_allclose(unletterbox_boxes(model_space, ratio, pad), box, atol=1e-6)

def test_colour_order():
    img = np.zeros((10, 10, 3), np.uint8); img[..., 2] = 255   # pure red in BGR
    x = to_model_input(img)                                    # expects RGB, CHW, 0..1
    assert x[0, 0].mean() == 1.0 and x[0, 2].mean() == 0.0
The names here are placeholders for your own functions. What matters is that each transformation has a test with a known answer. A red image must be red after conversion; a box must come back where it started.
Do the same for NMS and box decoding with hand-made inputs: two heavily overlapping boxes should become one; two separate boxes should stay two.
Layer 2: rule logic
Zone entry, dwell time, line crossing, cooldowns and schedules are where business logic lives, and they are fully testable without a model. Feed synthetic tracks, lists of timestamped boxes per track ID, and check the events:
def test_dwell_alert_fires_once_after_threshold():
    zone = Polygon([(0, 0), (100, 0), (100, 100), (0, 100)])
    rule = DwellRule(zone, min_seconds=10, cooldown_seconds=60)
    track = [(t, 7, (40, 40, 60, 80)) for t in np.arange(0, 30, 0.2)]  # 30 s inside
    events = run_rule(rule, track)
    assert len(events) == 1
    assert 10.0 <= events[0].time <= 10.5
Write tests for the edges: a person who leaves at 9.9 seconds, a track ID that switches in the middle, a frame rate that changes, a timestamp that jumps backwards, an event that spans midnight. Rule bugs found this way cost seconds to fix. Found in production they cost an angry phone call. Zone Intrusion and Dwell Time Alerts covers the rules themselves.
Layer 3: golden images
Pick a few dozen images that cover your important cases, run the full pipeline on them once with a version you trust, and save the output as the "golden" result. On every change, run them again and compare.
Compare after NMS, as boxes, not as raw tensors:
- Match new boxes to golden boxes by IoU, for example IoU at least 0.9 with the same class.
- Allow small score differences, such as 0.02.
- Fail on any missing or extra box above your deployment threshold.
Boxes near the threshold flip in and out with tiny score changes. Either exclude boxes within a small band around the threshold from the comparison, or compare at a threshold slightly below deployment and require only the confident boxes to match. Otherwise the test flakes on every library upgrade.
When a change is intended, such as a new model, regenerate the golden results deliberately and review the differences by eye before committing them. Never regenerate them just to make a failing test pass.
Layer 4: export parity
When you export a model to ONNX, TensorRT or another format, the exported model should give nearly the same results as the original. Run both on the same images and compare boxes as in layer 3. Expect small differences in FP32, larger ones in FP16, and larger again in INT8. Set the tolerance per precision rather than one for all.
For INT8 especially, parity on a few images is not enough; you need a full validation run. INT8 Quantization for Detectors covers that. The parity test's job is narrower: catch an export that is broken, for example wrong input normalisation or a missing output layer, which usually shows as a large, obvious difference.
Layer 5: replay tests
The slowest and most realistic layer: run the whole pipeline, including video decoding, tracking and rules, on recorded clips with known events, and score the result at the event level. This is where you catch interactions that the lower layers cannot see, such as a tracker change that breaks dwell times.
Keep this set small enough to run before every release, a few hours of footage at most, and curated to include your known hard cases. Building a Replay Set of Recorded Footage describes how to build and maintain one.
Replay results will not match exactly between runs if decoding or timing differs, so compare event counts and timings within tolerances, for example "same events, each within one second".
Making it routine
- Run layers 1 to 3 in CI on every commit. They should finish in a few minutes on a CPU.
- Run layer 4 whenever a model or export setting changes.
- Run layer 5 before each release, and save the results with the release.
- Pin library versions in the test environment, so a failing test means your change, not a silent upgrade. See Setting Up a Clean Python Environment for Computer Vision.
- Keep the test images and clips under version control or in versioned storage, so a test always runs on the same data.
Checklist
- Exact tests for resizing, colour order, coordinate mapping and NMS.
- Synthetic-track tests for every alert rule, including edge cases.
- Golden-image tests comparing boxes by IoU with tolerances.
- Threshold-band handling so tests do not flake.
- Export parity tests per precision.
- Event-level replay tests before release.
- Pinned versions and versioned test data.
Next steps: Building a Replay Set of Recorded Footage and Export YOLO to ONNX and Run It with ONNX Runtime.