Pseudo-Labelling with a Larger Model: Time Saver or Data Poison?
Labelling is usually the slowest and most expensive part of a detection project. So the idea is attractive: run a large, accurate model over your unlabelled frames, keep its boxes as labels, and train your small deployment model on them. A few hours of compute replaces weeks of drawing boxes.
Sometimes it works very well. Sometimes it fills the dataset with the large model's blind spots and habits, and the small model learns them faithfully. This article covers when pseudo-labelling helps, how it goes wrong, and a workflow that keeps the time savings without poisoning the data.
What pseudo-labelling means here
A "teacher" model proposes labels; people review some or all of them; a "student" model is trained on the result. The teacher can be:
- A larger detector of the same family, trained on your existing labelled data.
- A general model trained on a large public dataset, for classes it already knows, such as people and vehicles.
- An open-vocabulary detector that takes text prompts, for classes outside common datasets.
The student is the model you will deploy: smaller, faster, specialised to your cameras.
How it goes wrong
The teacher's errors become ground truth
Every false positive the teacher makes becomes a labelled object. Every object it misses becomes background, actively teaching the student to ignore that kind of object. The student then reproduces the teacher's errors with confidence, and since you measure it against the same kind of labels, you may not notice.
Misses are the more dangerous error, because nobody sees them. A teacher that misses people in dark corners produces a dataset with no people in dark corners.
Different definitions
A general model's idea of "person" includes people on posters, on screens and in reflections. Its boxes may include carried objects that your guide excludes, or box occluded people differently. The pseudo-labels follow the teacher's definition, not yours. See Writing an Annotation Guide Labellers Can Follow.
Confirmation loops
If the student is later used as the next teacher, errors compound. Each round makes the dataset more like the model and less like the world.
Licences
The teacher's licence may matter. Some model weights and some datasets they were trained on have terms that restrict commercial use. Check the licence of any model you use to create training data for a commercial product. See YOLO Licenses Explained.
A workflow that works
1. Treat pseudo-labels as suggestions
The safest use is pre-labelling: the teacher draws boxes, people correct them. Correcting a box is faster than drawing one, and deleting a wrong box is faster still. Many annotation tools can import model predictions for this purpose. See CVAT vs Label Studio vs Roboflow.
The time saving depends on how good the teacher is on your footage. Measure it on a small batch before committing: how long does a labeller take per image from scratch, and how long correcting pseudo-labels?
2. Split by confidence
Not every box needs the same attention.
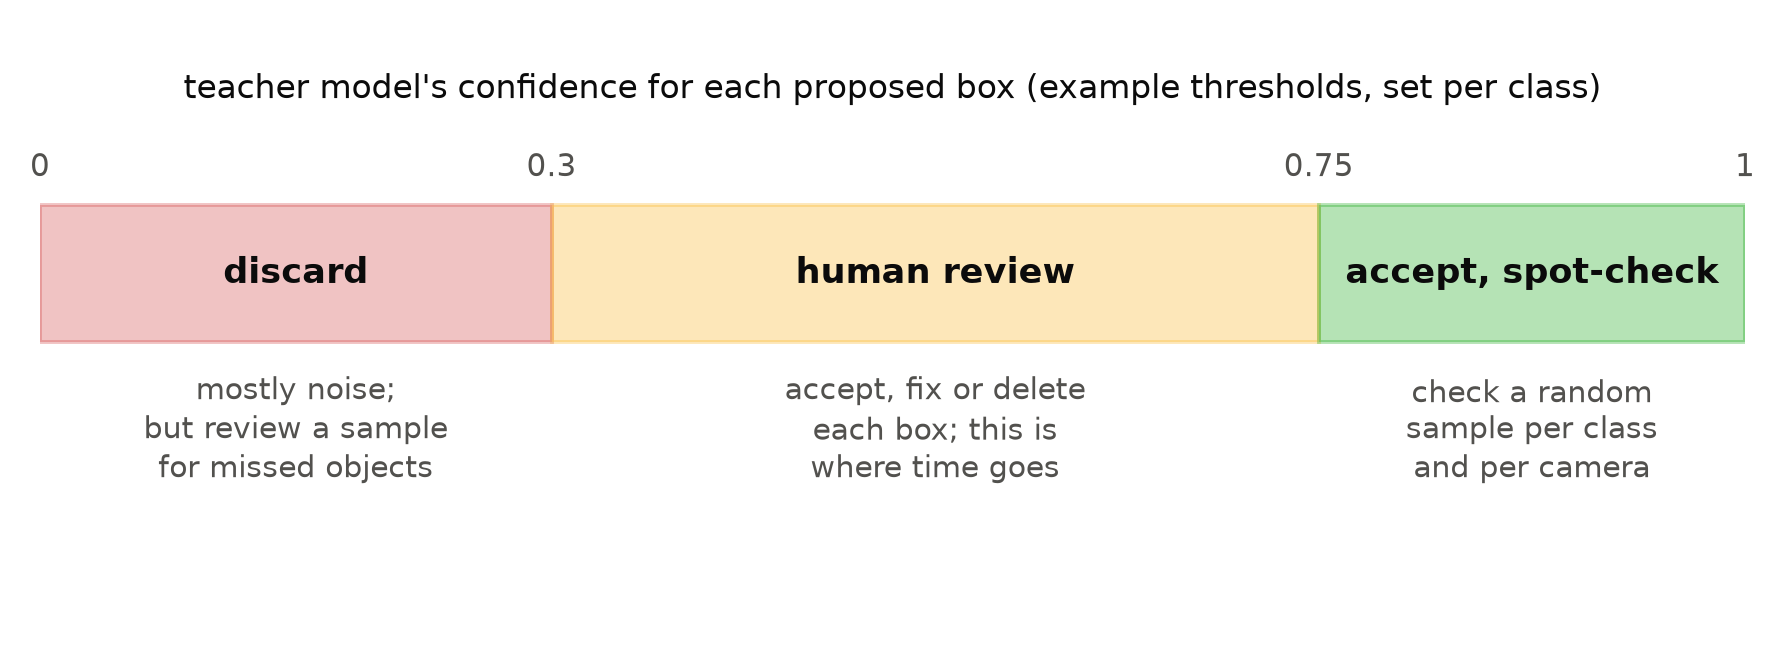
- High confidence: accept, but spot-check a random sample per class and per camera.
- Middle: human review of every box. This is where most corrections happen.
- Low: discard, but look at a sample. Real objects the teacher doubted often live here.
Choose the band edges per class, by checking a few hundred boxes and seeing where errors become common. Teachers are not equally reliable across classes, and confidence scores mean different things for different classes. See Why a Detector's Confidence Is Not a Probability.
3. Hunt for misses separately
Reviewing proposed boxes only catches false positives. To catch misses, review a sample of images completely, as if labelling from scratch, and count the objects the teacher missed. If the miss rate is high for some condition, such as night or far away, label that condition by hand.
4. Keep the test set human-labelled
Never evaluate on pseudo-labels. If the test set comes from the same teacher, the student is graded on how well it copies the teacher, and errors they share are invisible. The test set must be labelled by people, from scratch, following the guide. See Why Your Test Set Flatters You.
5. Track provenance
Record for each label whether it was drawn by a person, accepted from a teacher, or corrected from a teacher, and which teacher version. When a problem appears later, you can check whether it comes from teacher-labelled data and re-review only that part. See Versioning Datasets and Models Together.
When pure pseudo-labels are acceptable
Training on unreviewed pseudo-labels can be reasonable when:
- The teacher is strong on your footage, measured against a human-labelled sample, not assumed.
- The classes are ones the teacher knows well and defines the way you do.
- You use the pseudo-labelled data as extra data alongside a human-labelled core, not as the whole dataset.
- You evaluate on a human-labelled test set and compare with a student trained without pseudo-labels.
That last comparison is the real test. If adding pseudo-labelled data does not improve the student on a clean test set, it is not helping, however many images it added.
A quick way to estimate teacher quality
Before using any teacher, take 200 to 300 human-labelled frames from your cameras, run the teacher, and compare as you would evaluate any model: precision and recall per class at a few thresholds, split by day and night and by object size. This takes a day and tells you whether pseudo-labelling will save time or create work. Measuring Label Quality with Annotator Agreement describes the box matching.
Checklist
- Measure the teacher against human labels on your own footage first.
- Check the teacher's licence for commercial use.
- Use pseudo-labels as pre-labels for human correction by default.
- Set per-class confidence bands from a checked sample.
- Review full images separately to find misses.
- Keep the test set fully human-labelled.
- Record label provenance and teacher version.
- Compare students trained with and without pseudo-labels on a clean test set.
Next steps: Hard Negative Mining from Production Footage and Deduplicating Video Frames Before Labelling.